What is Xamarin and Everything You Need to Know About Xamarin
The Do It Yourself concept has been moving around lately throughout the Internet. These days it has moved beyond household works and entered the technology domain. Why would you wait for a software company to develop something if you have the means to do it yourself? For a related workflow, see AI.
Open Source platforms all over the internet provide the tools and knowledge to get it done. Xamarin is one such open-source app platform to help develop mobile software with different compatibilities across platforms. Xamarin Studio is a Microsoft undertaking company, that’s why it very useful and powerful. So if you want to know more, keep reading.
- Part 1: What is Xamarin?
- Part 2: What Language is used in Xamarin?
- Part 3: Is Xamarin free?
- Part 3: The Best Design Tool
What is Xamarin?
Xamarin was a cross-platform .NET technology acquired by Microsoft and used for sharing application code across supported platforms. The historical adoption figures in older versions of this article are not current benchmarks. For a maintained project, check Microsoft's current migration guidance before starting new work.
Xamarin provided shared C# code with platform-specific APIs and project files. The amount of code that can be shared depends on the application and platform APIs, so a fixed percentage should not be assumed. Treat this page as historical background and assess a maintained .NET/.NET MAUI path for new or actively supported work.
Shared code can be edited on different development machines, but platform builds, signing, SDK versions, and device testing still depend on the target platform toolchain. Confirm the current SDK and signing requirements before choosing a migration or build setup.
All the apps that are built using Xamarin leverage a platform-specific hardware acceleration, and they are compiled for native performance.
You can Perform a full ahead-of-time (AOT) compilation on these apps to increase memory sharing, reduce startup time, and improve performance.
The Apps built using the Xamarin platform have access to all the functionality from the underlying platforms and devices. It includes platform-specific capabilities like CoreML, ARKit, Bluetooth, Fingerprint, NFC, and more!
What Language is used in Xamarin?
Xamarin development was done in such a way that it uses a matured single language, C# to create cross-platform applications. C# is a mature language that has strong safety typing in place. It helps developers write the code accurately to prevent unnatural behavior while compiling or executing. C# is one of the .NET framework languages that could be useful for multiple .NET benefits such as LINQ, Lambda, Asynchronous programming like await or async.
Xamarian uses C# along with native libraries from the .NET layer for cross-application development. Since Xamarin is compiled natively, it's the perfect choice for building high-performance applications with the feeling of a native tool. You will get to use Visual Studio Xamarin along with C# to create the applications.
Xamarin support and project planning
Xamarin was distributed through the .NET and Visual Studio ecosystem, but its support lifecycle has ended. Review the current Microsoft lifecycle and migration guidance, then check the tools and licenses required by the target platform.
Do not use the former plan names or prices in a new project decision. Compare the supported .NET/.NET MAUI tooling, platform SDKs, testing devices, and team support requirements against your project constraints.
The Best Design Tool
The market is filled with design tools but not all provide the same experience. Mockitt is a rapid prototyping solution that helps you create interactive prototypes without having any coding knowledge. It comes with a simple drag and drop editor, which allows you to create professional prototypes in a short period of time. Mockitt also gives you the option to preview your prototypes while working on them. This helps you inspect your creation and make necessary amendments without any hassle.
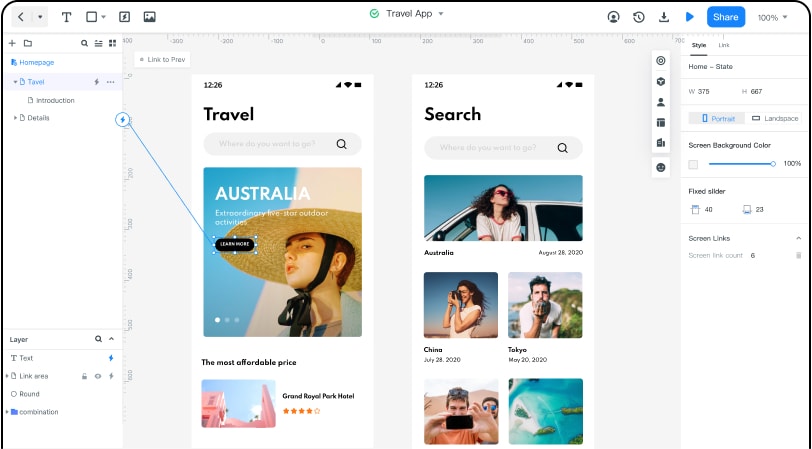
Here is the detailed guide on how to use Mockitt:
Step 1: Create a prototype and choose the size.
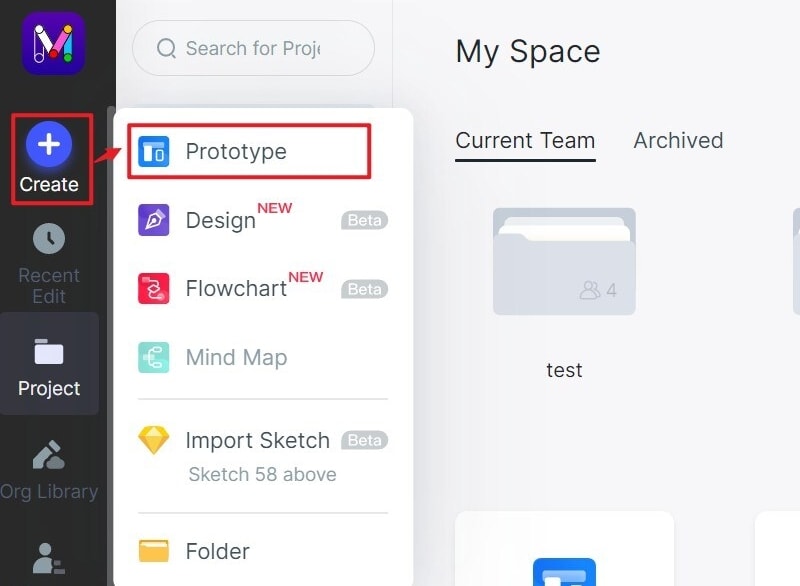
Visit the official Mockitt website and create an account. Then go to the dashboard and click on the “Create New Project” option. Now in the next window, you will see a bunch of devices. You can choose one of them or create your own custom size.
Step 2: Add Widgets to the canvas
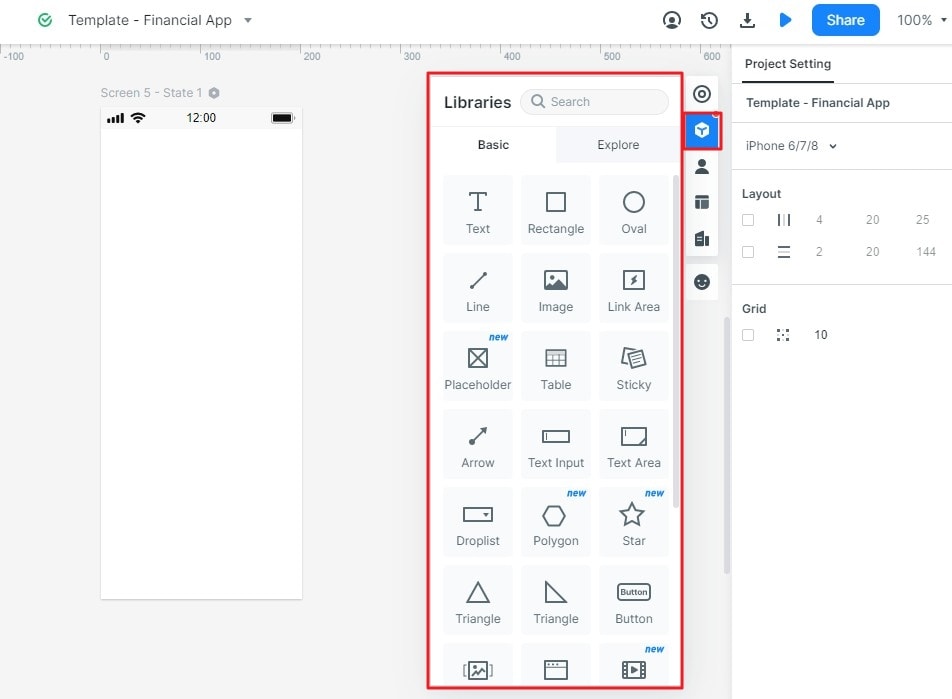
After doing this, you will get access to the main artboard. In this screen, you will see various tools and features. To add widgets to the canvas, you have to click on the cubical icon, which will be placed on the right side of the artboard. Choose the widget you want to use and drag it to your canvas.
Step 3: Add Interactions to Page and Screens
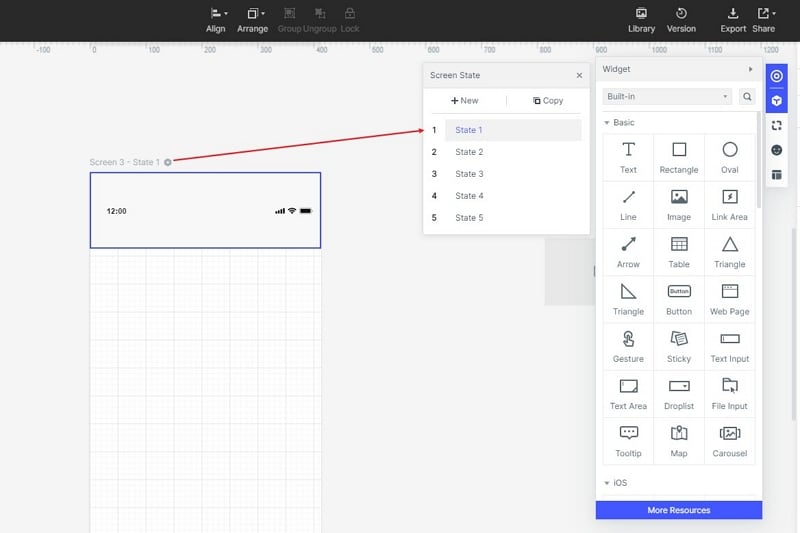
Adding interactions to the pages and screens with Mockitt is very simple. You just have to create states and link them to each other. To do that, you have to click on the state icon. Then create states as per your needs. Once you have done that, choose the component in state 1, in which you want to add interactions. Then add the interaction in State 2 and link them together by dragging the flash icon to state 2. You can add multiple interactions by following the same steps.
Step 4: Preview Your Prototype like Real
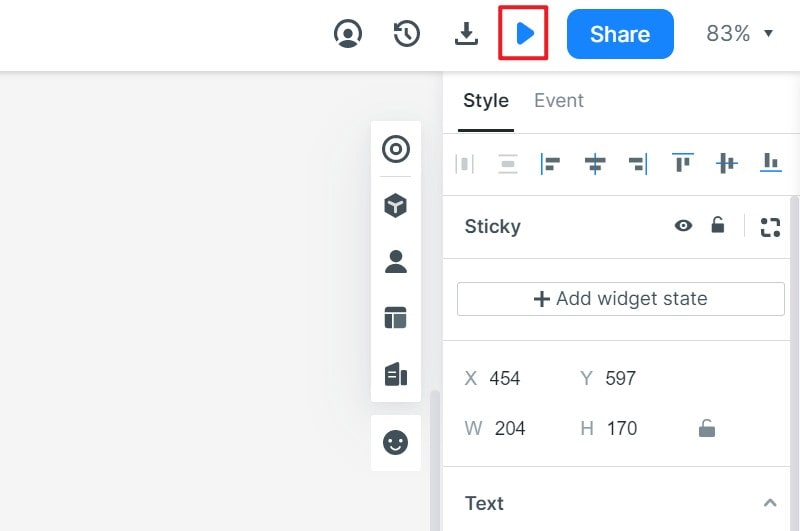
If you wish to preview your prototype, then click on the preview icon and it will create a real-time version of your prototype. This is very helpful as you could easily identify the errors and rectify them without wasting a lot of time.
Step 5: Share Your Prototype for Feedback and Comments
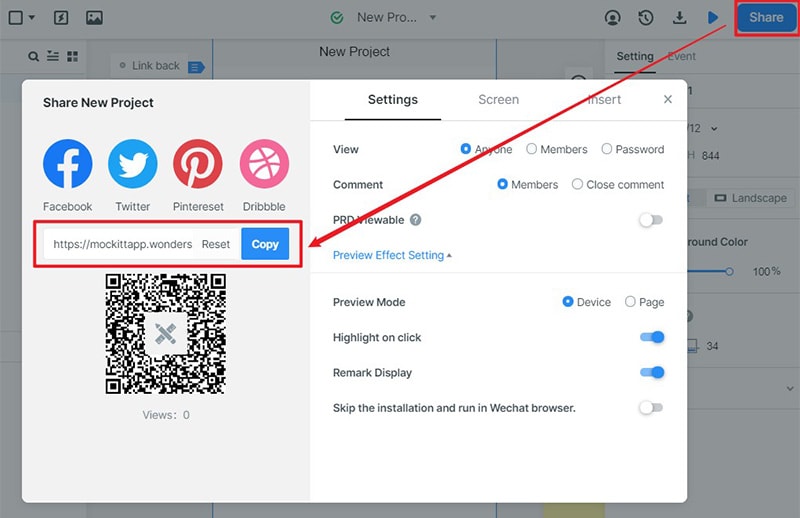
With Mockitt, sharing your prototype is extremely simple. Simply click on the share button and it will give you multiple options to share your project. It also you to gather feedback from your team or friends.